Getting Started
Step by step guide to setup the Search by Algolia plugin for WordPress.
Algolia Credentials
When connected to the WordPress admin panel, search for the following Algolia Search entry in the left sidebar, and click on it.

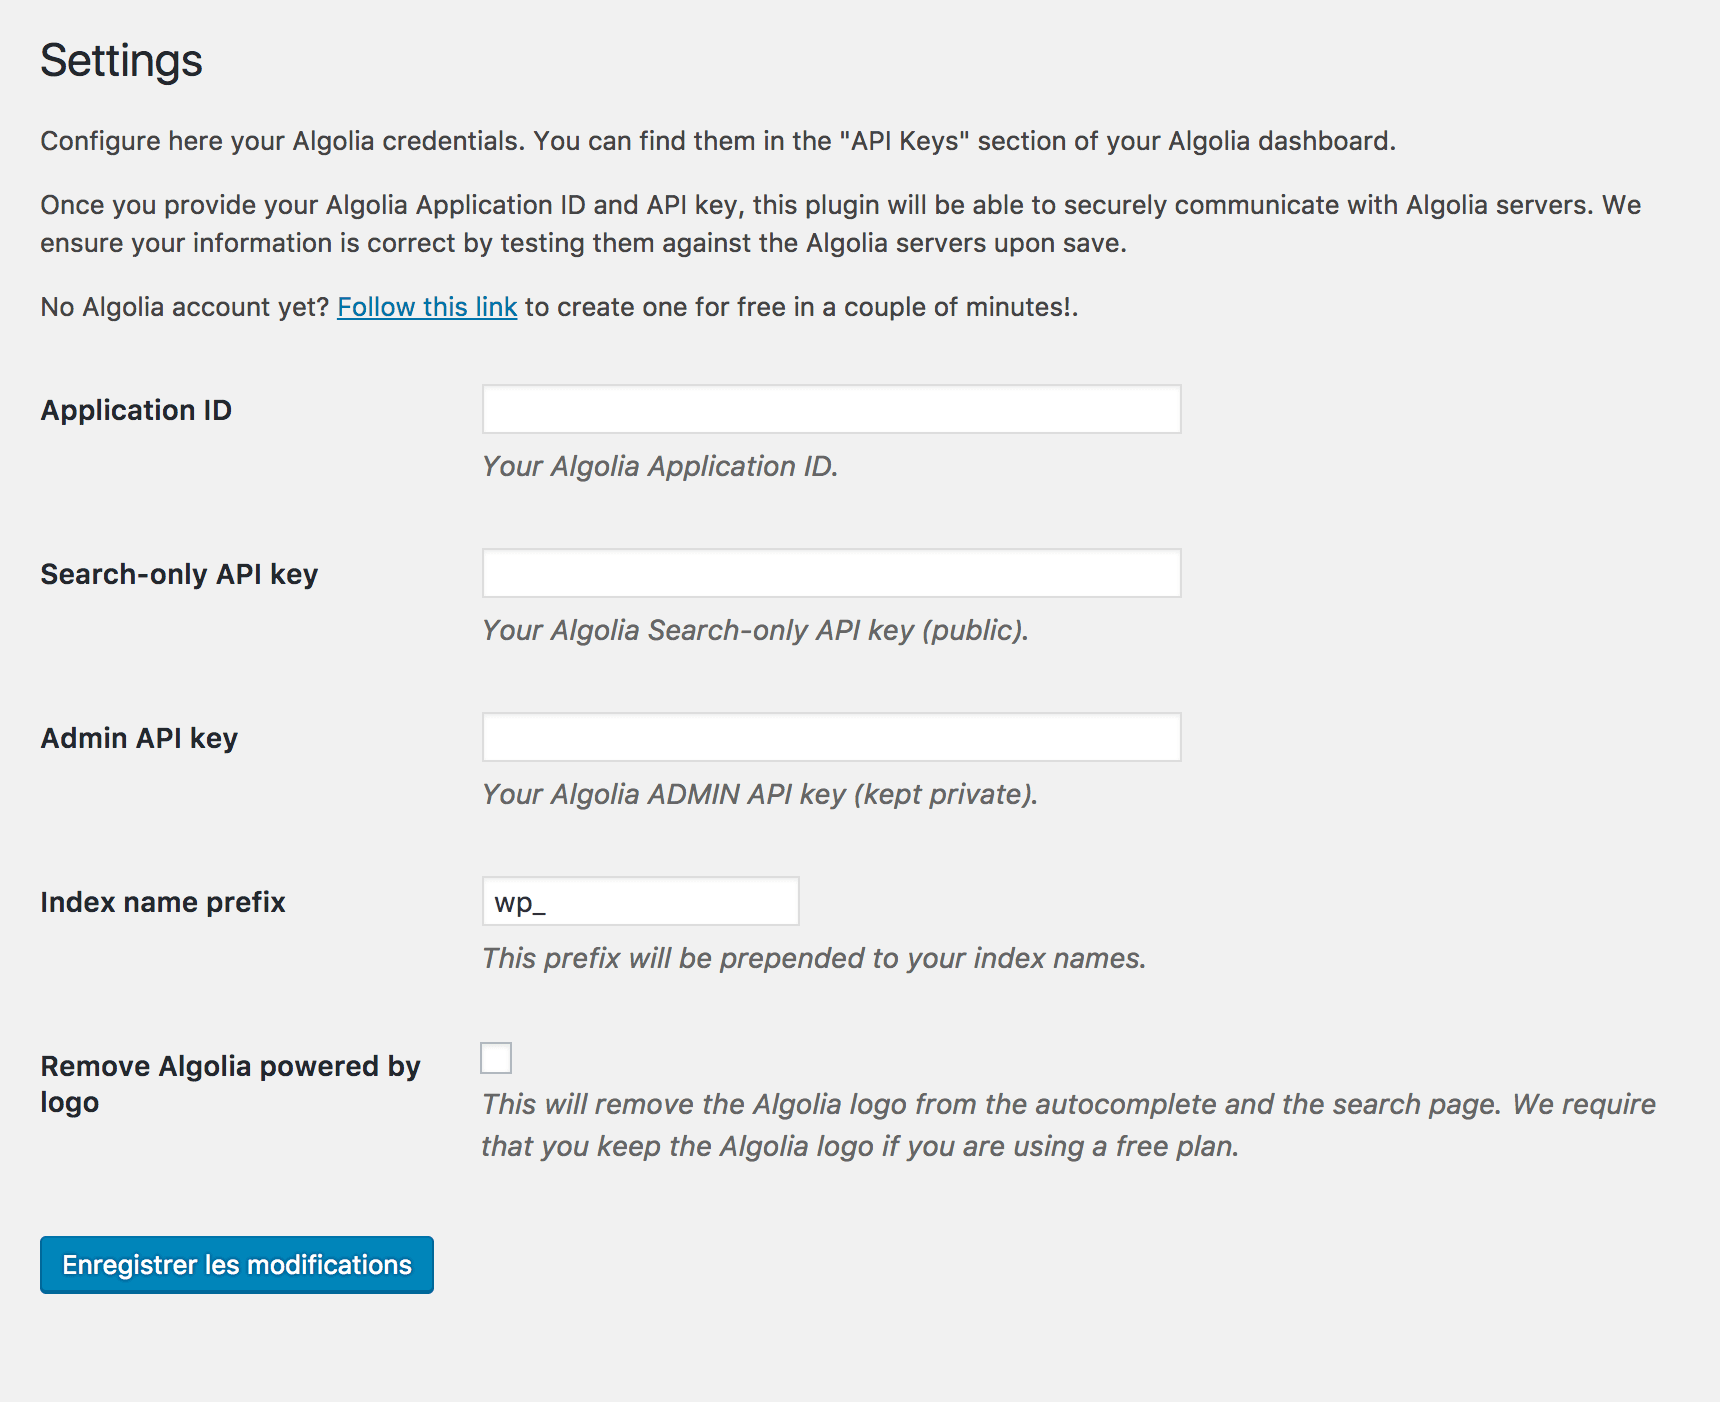
You will face the following form asking for your Algolia credentials.
If you have no Algolia account yet, you can create one in a few seconds for free over here.
Once you have created your account and you have signed in, access your Algolia API keys by following this link.
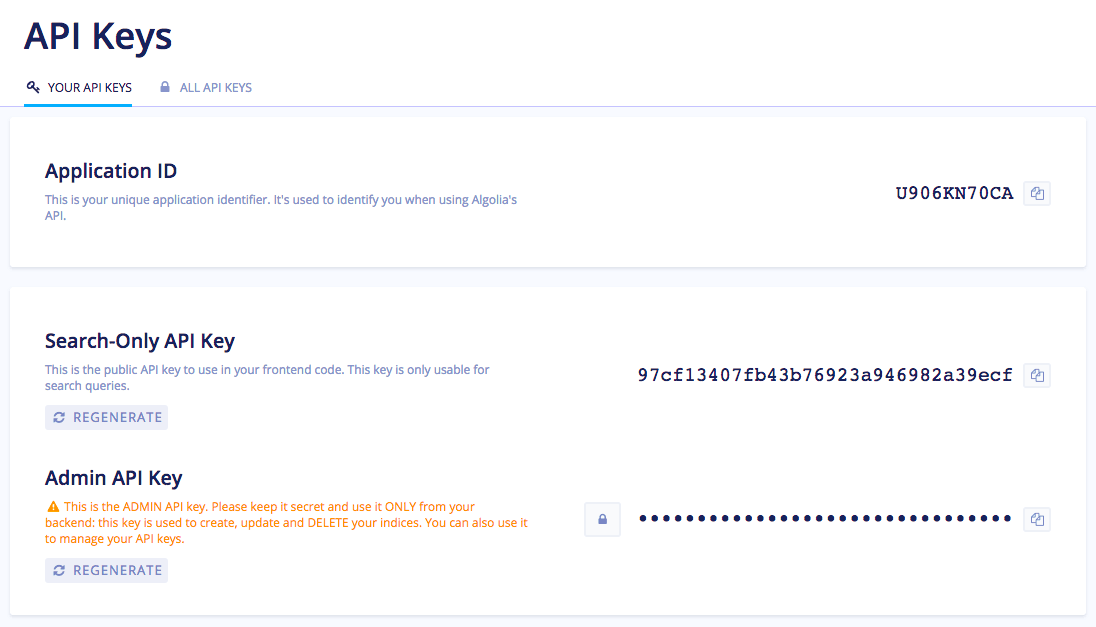
From that screen you will be able to copy/paste the following necessary keys from the Algolia dashboard to your WordPress admin form:
- Application ID
- Search-Only API Key
- Admin API Key
Once you have filled in the 3 required keys, click on the Save Changes button at the bottom of the form.
Once you have correctly provided WordPress with your Algolia keys you will now see the Algolia Search menu entry has also expanded:

Autocomplete & Indexing
The easiest way to offer your users a nice find-as-you-type search experience is through our autocomplete feature, which shows a dropdown menu below the search bar.

Now, let's head to the Autocomplete submenu. To enable the Autocomplete feature, tick the box above the configuration table:

Before you can search anything with Algolia, you need to synchronize your data. You should now be facing a list of elements like:
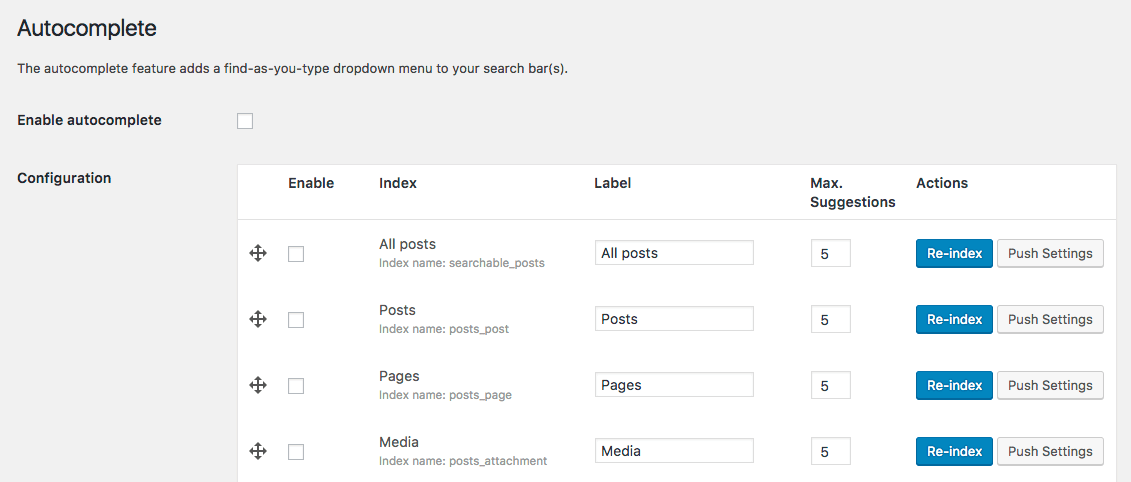
The Algolia Search plugin uses WordPress core features such as Custom Post Types, Custom Taxonomies or Users to find potential content types to index. Any plugin creating new Post Types or Taxonomies will automatically be listed here an eligible for synchronization with Algolia.
| Setting name | Description |
|---|---|
| Enable | Make search results for this index available through the autocomplete. |
| Index | The type of data And the name of the index name in Algolia dashboard |
| Max. Suggestions | The maximum number of suggestions to display for this index. Only the n most relevant search results will be displayed for this index, and the others will be discarded. |
| Position | Determines the display position of suggestions in relation to the other autocomplete enabled indices. The bigger the position, the lower the section will be in the display. |
Let's proceed by choosing the indices you want to make searchable on your website, for example Posts, Pages and Users. Simply check the corresponding checkboxes and click on Save Changes.
Green validation messages should confirm that the selected indices are about to be synchronized with Algolia.
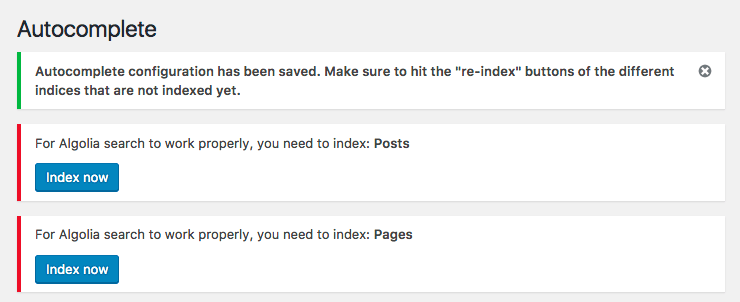
Click on the Index now button to quickly send your content to Algolia. After that everything will be kept in sync automatically.
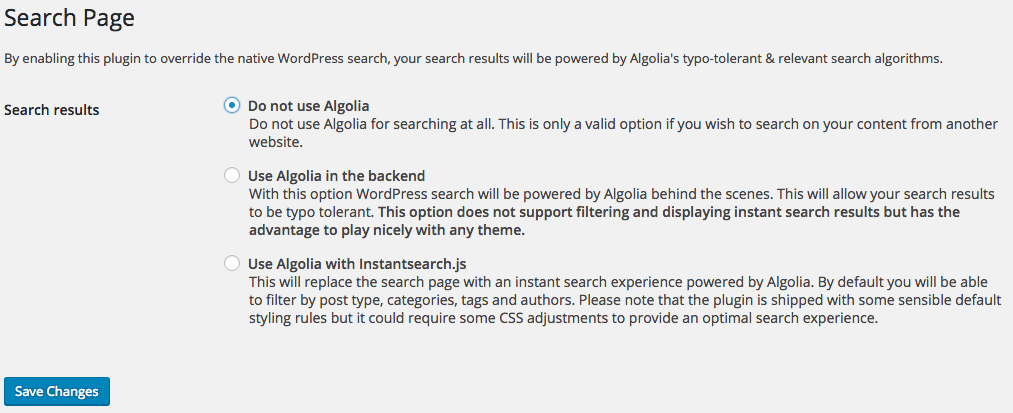
Search Page
WordPress has a built-in search engine relying on SQL queries. The problem is that it does not support the features of the Algolia search engine such as typo tolerance, custom ranking, and a lot more that you can check out on the www.algolia.com website.
This plugin lets you override WordPress native search with Algolia.
Replacing the WordPress search feature ensures you get the same results than what you see in the autocomplete feature.
Once you click on the Search Page entry under the Algolia Search menu, you will be given 3 options. If you choose "Use Algolia in the backend" or "Use Algolia with Instantsearch.js", the native search will be replaced by Algolia.
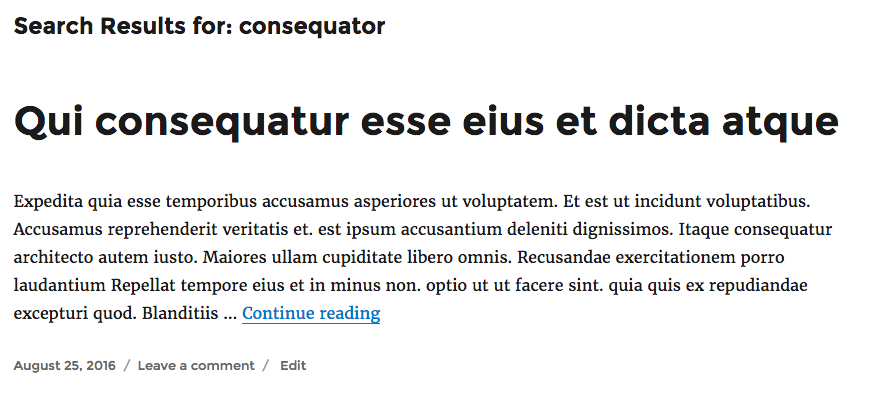
Use Algolia in the backend
With this option WordPress search will be powered by Algolia behind the scenes.
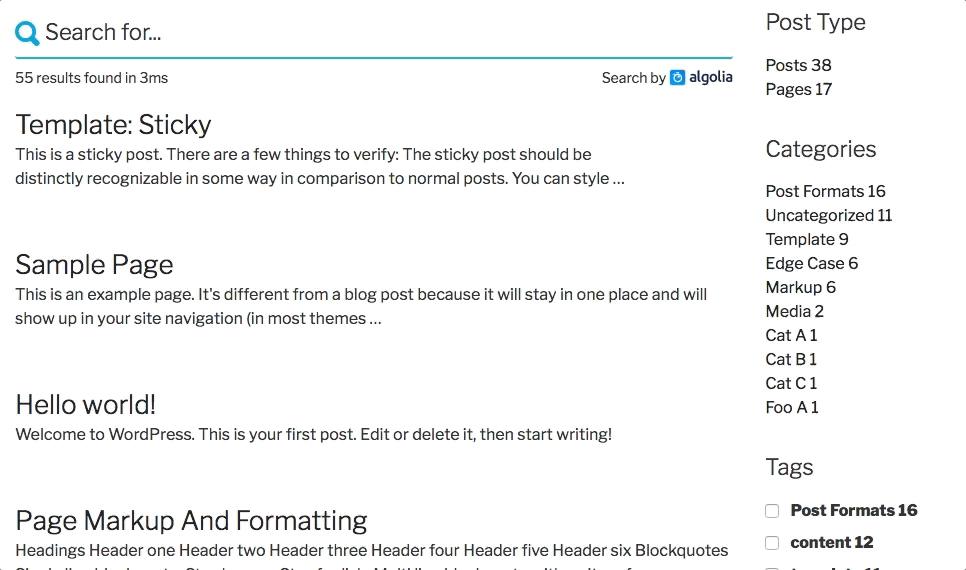
Use Algolia with Instantsearch.js
With this option WordPress search will be powered by the instantsearch.js library. It replaces your search results page with an instant search experience.
From Here On Out
You want to understand more in depth what Algolia is and how you can benefit from it? Please consult our getting started: https://www.algolia.com/doc/guides/getting-started/what-is-algolia/